Arrival function is the gateway for guest to check-in. We have included all required types of functions in our arrival list to make your work easier. You search for guests via number of customization criteria, check them in and even perform other tasks related to guests individually like Edit Reservation, Draft a Message, set Wake-up Call, Alerts & Traces.
Follow the below steps to know about the functions:
- Click on “Arrivals” menu under “Common Tools” menu.

In Arrival list you can view the fields like Reservation Id, Guest First Name, Guest Last Name, Room #, Room Type, Arrival Date, Departure Date, Total number of nights, Front Office Status (Due In, Checked In), Service Status, Action Task buttons.

- Search bar is shown on top of each field from where you can search the arrivals as per your requirement.

- Click on for more advance search options as shown in the below screen shot.

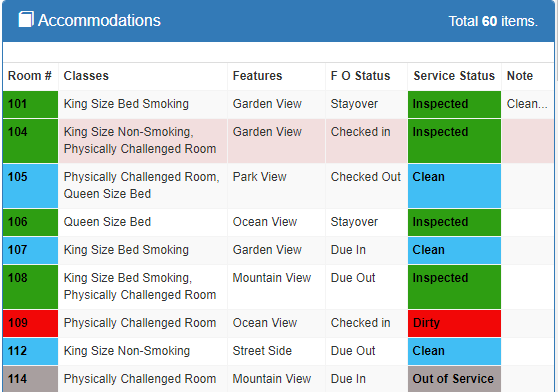
- To assign and de-assign rooms click on the room no. cell, a list will appear with the room numbers those are eligible to be assigned for that particular room type. Click on the row that you want to assign.
Now we will learn the use of Action Buttons given below Action Task.
- Click on to check-in a guest. If the service status of the assigned room is inspected than you are able to check-in but for any other service status like pick up, dirty and clean, check-in will be restricted. After check-in is shown the Front Office Status will change from “Due In” to “Checked In” and the action button will also change.
- Click on to cancel check-in that is shown in PMS already. On cancelling the check-in the FO status will again change to Due In.
- Click on to send the room to Queue which will be possible for all types of service status except Inspected. The Queue option allows you to place an arriving reservation into queue when the room assigned is not ready. When a guest arrives and the room assigned is not inspected, this feature will help housekeeping to prioritize their work. When the room status is changed by Housekeeper to Inspected then automatically this room will appear in Arrival List.
- Click on to print the Registration card which is required of check-In. This feature helps you to pre-print the Registration Card prior to guest’s arrival. If in-case the card is lost you can reprint the same again.
- Click on for editing any reservation instruction. This action button will direct you to reservation page where you can make changes to any field. After making all changes you need to save the changes made to that reservation.
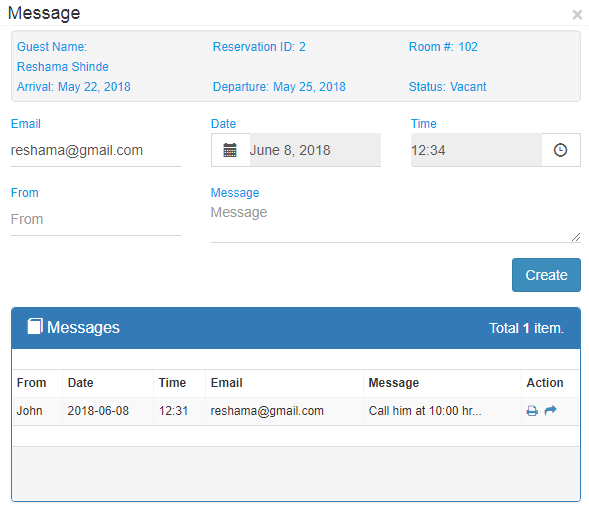
- Click on to create or edit any guest message. After clicking on this button the message form will open where you can draft your message. After drafting the message click on create button given in the form. Message that is created will show in the below grid from where you can send e-mail or take a print. To send e-mail click on message will be send to guest e-mail id if mentioned, click on to print to message.
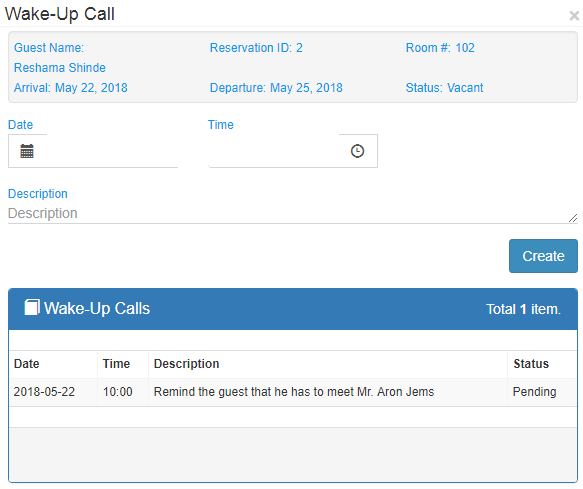
- Click on to set wake- up call for guest. After clicking on this button the wake- up call form will open where you need to fill the date and time of the call. We have also included a description space where you can mention any notes related to the wake-up call. After filling all details click on “Create” to save the call, this will show in the below grid with the status as “Pending”.
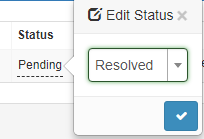
There is a separate menu for “Wake-up Call” under “Common Tools”. According to dates the wake-up calls will be listed & after giving the call to guest you need to resolve the same by clicking on the status cell and change the status to “Resolved”.
After the call is resolved it will go down and pending calls will feature on top of the list according to time.
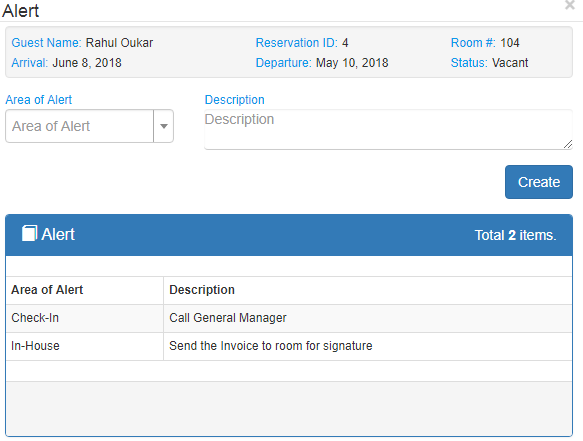
- “Alerts” are attached to reservations to create pop-up windows, that alerts you each time you access Alert Location. Click on to create “Alert”. In-case of any important task need to be remembered then you can always create an Alert at that location. “Alerts” can be created on different locations like; (Check-In, In-house, Check-Out). Alert will pop-up whenever you access that location.
Steps:
When you click on Alert action button a form opens where you need to select the location from the drop down list and write the message / task in the description space and click on “Create”. All Alerts created for that particular guest will show in the below grid.
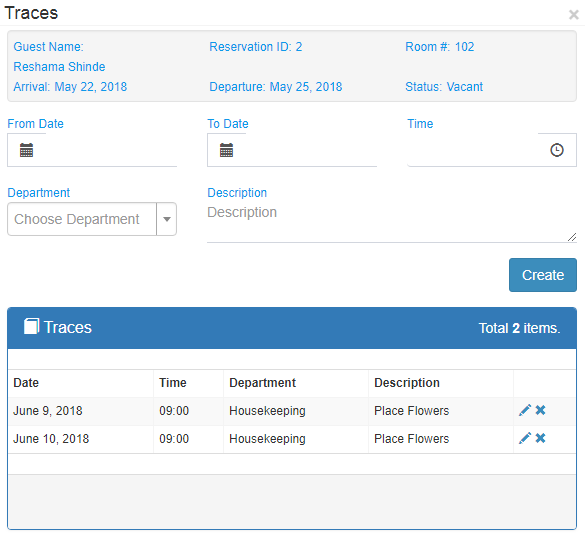
- “Traces” are for inter departmental communication. Traces helps you to take actions on special requests from guests. Traces can be created as per request date and time and also allot to a department where it belongs to. Click on to create a “Trace”.
Steps:
When you click on Trace action button a form opens where you need to mention “From Date” & “To Date”, “Time”, “Department” and Task in the description space and click on “Create”. All Traces those are created will be shown in the below grid and in the Trace menu the tasks will be shown date wise and according to login departments. Once completed you can resolve the same from main menu.
Arrival List is also accessible from “Arrival & In-house” menu under “Front Desk” with all the functionalities as mentioned here.